Top 5 Techniques for Scanning Large Objects with Handheld 3D Laser Scanners: Master Alignment, Stitching, and Drift Reduction
Top 5 Techniques for Scanning Large Objects with Handheld 3D Laser Scanners: Master Alignment, Stitching, and Drift Reduction
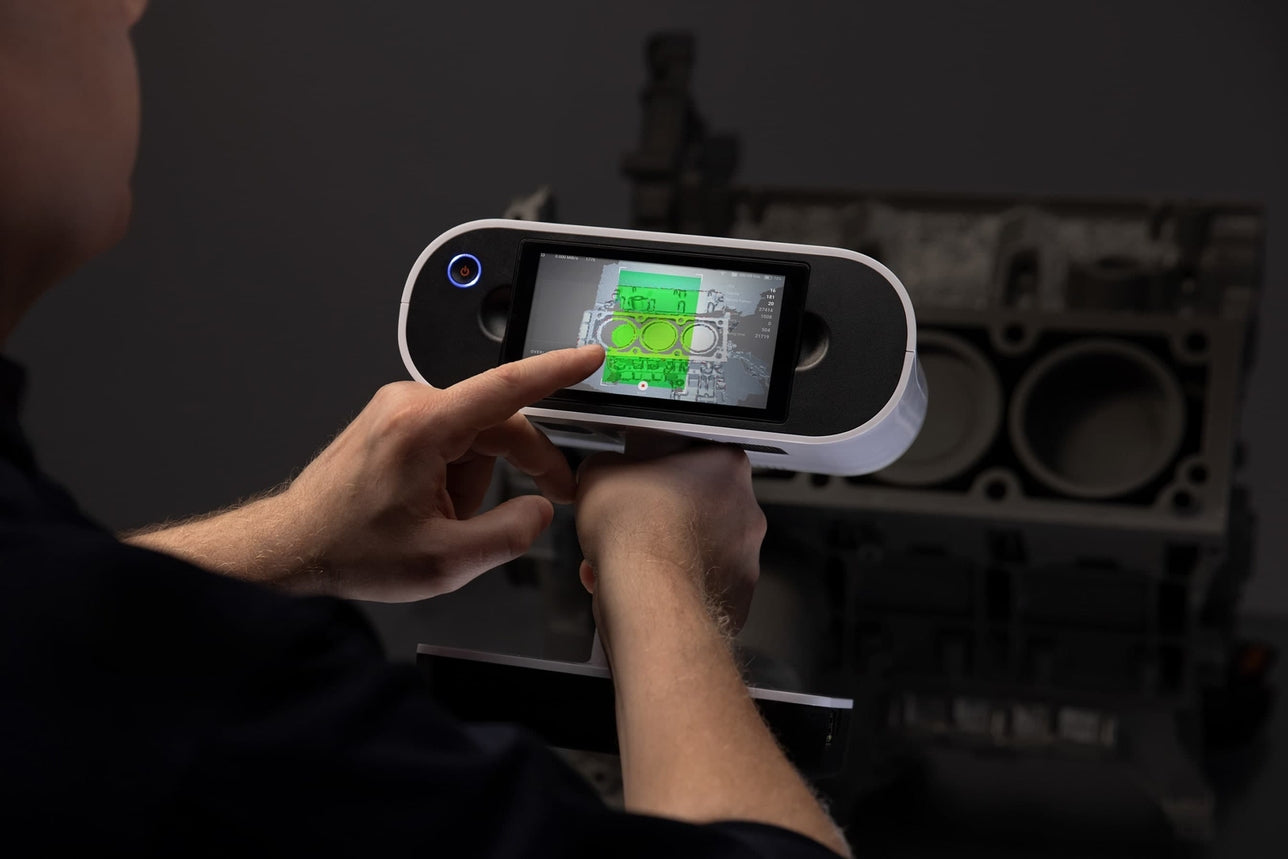
In the world of 3D scanning, capturing large objects can be a daunting task. Whether you're working on industrial design, architectural preservation, or even creating digital assets for entertainment, the ability to scan large objects with precision is crucial. Handheld 3D laser scanners provide a powerful solution, offering flexibility and portability that stationary scanners can’t match. However, scanning large objects involves more than just pointing and scanning. It requires mastery of specific techniques to ensure accuracy and minimize common errors like alignment issues, data drift, and gaps in the point cloud.
In this guide, we'll walk you through the essential techniques and best practices for scanning large objects with handheld 3D laser scanners. Along the way, we will discuss common challenges and how to overcome them, focusing on how to achieve the most accurate results in your scans. We’ll also introduce some of the best handheld 3D scanners in the market that offer advanced features to help you tackle these challenges. Let's dive in!
1. The Importance of Proper Alignment: A Core Step in 3D Scanning
Alignment is perhaps the most critical aspect of handheld 3D laser scanning. Scanning large objects typically requires capturing data from multiple positions around the object, and each scan needs to align perfectly with the next to form a seamless 3D model. Misalignment, even by a fraction of a millimeter, can lead to discrepancies in the final scan, which is particularly problematic for precise applications like reverse engineering or inspection.
Why Alignment Matters
Accurate alignment is essential for several reasons:
- Consistency: Ensures that the data from multiple scans matches seamlessly.
- Time Efficiency: Avoids the need for manual corrections during post-processing.
- Accuracy: Prevents misaligned scans that could result in structural errors in the model.
Types of Alignment Techniques
There are several methods for aligning scans in handheld 3D scanning, and the choice of technique depends on the scanner you use, the object you're scanning, and your workflow.
Feature-Based Alignment Feature-based alignment uses distinct, natural features in the scanned environment, like corners, edges, or texture, as reference points for alignment. This method works well in environments where there are identifiable patterns, but it can be challenging if the object lacks enough unique features.
Target-Based Alignment Target-based alignment relies on the use of markers or targets placed strategically on the object’s surface. These markers provide reliable reference points that help the scanner align data from different positions. In professional-grade handheld scanners, these targets can be detected automatically, making the process smoother and more efficient.
For large and complex objects, FARO Freestyle 2 integrates both feature-based and target-based techniques to achieve precise alignment. With its integration of FARO SCENE software, users can optimize alignment through target placement or using the object’s inherent features, allowing for accurate scans regardless of object size.
Real-Time Alignment with Visual Localization
For handheld scanners, the best way to achieve alignment in real-time is through visual localization, which allows users to see the alignment as they scan. Visual localization is especially useful when scanning large or intricate objects because it offers immediate feedback on the quality of each scan, allowing users to adjust their position and alignment on the fly.
Leica BLK2GO, for example, uses SLAM (Simultaneous Localization and Mapping) technology. This enables users to track the scanner’s position and adjust its orientation in real-time, ensuring alignment without the need for manual intervention. The scanner continuously updates the 3D model as you move around the object, providing a dynamic scanning experience.
2. Stitching Data Together: Combining Multiple Scans for a Cohesive Model
Once you've captured multiple scans from different angles, the next step is stitching the data together. This process, known as point cloud registration, involves aligning and merging the point clouds from each scan into a unified model. Without proper stitching, your data may remain fragmented, leading to incomplete or inaccurate models.
The Challenges of Stitching Large Objects
When dealing with large objects, the challenges of stitching scans become more pronounced. With larger objects, the number of individual scans increases, which means the likelihood of errors in registration also rises. Gaps, misalignments, and inconsistencies can crop up if you don’t carefully manage the stitching process.
Automated Stitching
One of the most advanced features of modern handheld 3D scanners is automated stitching. Using onboard software and real-time processing, scanners can automatically combine point clouds as you scan, eliminating the need for time-consuming manual alignment. This feature is particularly valuable when working on large-scale projects, as it minimizes downtime between scans.
Artec Leo is an excellent example of a scanner that excels at automated stitching. Using the advanced Artec Studio software, the Leo can automatically merge point clouds as scanning progresses, ensuring that each scan is incorporated into the model seamlessly. This is especially helpful for scanning large objects like vehicles, machinery, or architectural structures, where precise stitching is critical.
Manual Stitching and Post-Processing
In some cases, automatic stitching may not be enough, especially for highly detailed scans of large objects. In these cases, manual stitching during post-processing becomes necessary. Using software like Autodesk ReCap, MeshLab, or CloudCompare, users can manually fine-tune the alignment and stitching of point clouds. Post-processing gives you the flexibility to correct minor misalignments and optimize the model further.
Creaform HandySCAN 3D scanners, for example, are known for their excellent post-processing capabilities with the VXelements software suite. This software provides advanced tools for refining the stitch, compensating for small errors, and ensuring that your final model is both accurate and complete.
3. Reducing Drift Errors: Maintaining Precision Across Long Scanning Sessions
Drift is one of the most common issues when scanning large objects with handheld 3D scanners. Drift occurs when the scanner's position or orientation slightly shifts between scans, leading to misalignments in the final model. This is especially problematic when scanning large objects over extended periods, as even small shifts in position can compound over time.
How Drift Occurs
Drift typically happens when the scanner relies solely on the data captured in the scan itself to determine its position. Without proper tracking or real-time correction, the scanner's positional data can gradually diverge from its actual location, resulting in misalignments in the point clouds. The larger the object, the greater the risk of drift.
Minimizing Drift in Real-Time
The best way to combat drift is by using scanners equipped with real-time tracking technology. IMU (Inertial Measurement Units) and visual localization systems are both highly effective at minimizing drift errors during the scanning process.
For instance, Leica BLK360 incorporates an IMU sensor that tracks the scanner’s orientation in space, helping to ensure that it stays aligned with previous scans. This, in combination with Leica Cyclone REGISTER 360 software, enables real-time drift compensation and precise alignment as you move around the object.
Post-Processing Drift Correction
Even with real-time tracking and alignment, drift may still occur, especially during long scans. Fortunately, post-processing software offers powerful drift correction tools. Programs like CloudCompare and MeshLab can be used to manually adjust point clouds and correct any drift errors that may have accumulated during scanning. These programs offer tools like Iterative Closest Point (ICP) algorithms, which help fine-tune the alignment and eliminate errors.
Creaform HandySCAN 3D takes this a step further by incorporating advanced drift compensation algorithms directly into its scanning software. The scanner continuously adjusts to minimize drift errors as you move around large objects, ensuring that the final model is both accurate and cohesive.
4. Additional Tips for Efficient Scanning of Large Objects
While mastering the core techniques of alignment, stitching, and drift reduction is critical, there are several additional best practices to keep in mind when scanning large objects.
-
Prioritize Overlap: Ensuring that each scan has enough overlap with the previous one is essential for proper alignment. Overlap ensures that there are enough reference points for the software to stitch the data together effectively.
-
Scan from Multiple Angles: When working with large objects, it’s essential to scan from multiple perspectives. By capturing the object from various angles, you ensure that all surfaces are covered and that there are enough reference points for alignment and stitching.
-
Environmental Considerations: Lighting, surface texture, and motion can all affect the quality of your scans. When scanning large objects, consider the environment carefully. Ensure that lighting is uniform, and the object’s surface is textured or treated for optimal scanning results.
-
Use of Scan Targets: Using physical scan targets can significantly improve alignment, especially in large-scale projects. Place targets in easily visible locations and ensure that they are spaced evenly around the object.
5. Optimizing Scan Resolution and Scan Speed: Balancing Detail with Efficiency
One of the challenges when scanning large objects is finding the right balance between scan resolution and scan speed. High-resolution scans capture more detail, but they also require more time to process and can slow down the scanning process. On the other hand, scanning at lower resolution may speed up the process but might miss important details. Finding the optimal setting is crucial, especially for large objects, where the sheer volume of data can overwhelm your scanner and software.
Why Resolution and Speed Matter
Scan resolution determines the level of detail captured by the scanner. Higher resolution provides more accurate models with finer details, but it also increases the amount of data collected. This can be problematic when scanning large objects, as the large point cloud data sets generated can be difficult to manage. Additionally, the higher the resolution, the longer it takes to complete the scan.
Scan speed, on the other hand, directly affects how quickly you can gather data from the object. While faster scans are beneficial for time-sensitive projects, too much compromise on resolution can result in missing crucial data, leading to inaccuracies in the final model.
How to Optimize Both
To achieve an optimal scan, start by determining the level of detail you need. For instance, when scanning large industrial machinery, you may want a high-resolution scan to capture small features, whereas scanning a large building might not require as fine a level of detail.
Real-Time Feedback: Some scanners allow you to adjust resolution on the fly based on real-time feedback during the scan. By monitoring the model as it’s built, you can fine-tune the resolution as needed for different areas of the object.
Adaptive Scanning: Adaptive scanning is an innovative feature offered by some handheld 3D scanners. This technology automatically adjusts the scanning resolution in real-time depending on the object’s surface and complexity. For example, more intricate or detailed sections of the object are scanned at higher resolution, while simpler or less detailed areas are scanned at a lower resolution. This not only helps reduce the overall scan time but also ensures that you capture the necessary details in critical areas.
The Artec Leo is a good example of a scanner that balances high scan resolution and speed. The Artec Studio software that accompanies it includes adaptive scanning features that adjust resolution dynamically. This ensures you get both efficiency and accuracy during your scan, even when dealing with large and complex objects.
Tips for Efficient Scanning:
- Plan Your Scan: Before starting, determine which parts of the object require higher resolution and which parts can be scanned quickly. This will help you avoid over-scanning less important areas at high resolution.
- Use Multiple Scan Levels: For large objects, you can use a combination of different scan levels. Start with a lower resolution for the bulk of the object and finish with higher resolution scans for detailed sections.
Conclusion: Unlocking the Power of Handheld 3D Laser Scanners
Handheld 3D laser scanners offer unparalleled flexibility and accuracy when capturing large objects, but they do come with challenges. Mastering the alignment, stitching, and drift-correction techniques discussed in this guide will help ensure that your scans are precise, cohesive, and free from errors.
By leveraging cutting-edge technologies such as SLAM, IMUs, and visual localization, scanners like the Leica BLK360, Artec Leo, and FARO Freestyle 2 make large object scanning faster and more accurate than ever before. Whether you’re working on architectural surveys, industrial design, or cultural heritage preservation, these scanners provide powerful solutions for capturing large-scale models with exceptional detail.
For more information on the latest 3D scanning technology and to find the right solution for your needs, visit PointCloudMasters.com. Our team is ready to help you find the perfect scanner to elevate your scanning projects to the next level.